Latest News

River Safety & Rescue: The Safety Talk

A clear and thorough safety talk is one of the most important elements of any competent, professionally run river trip.
by Ben Costello, April 2016
A clear and concise paddle and safety talk is a very important component to any river trip. The experience and familiarity level of the group might determine how thorough the discussion will be, but all trips should have a safety talk in some form. It should never be assumed that every member of a paddling trip is fully knowledgeable about river safety procedures and paddling techniques. Even experienced groups of paddlers should, at a minimum, briefly discuss hand signals to be used and the general plan for the trip.
A well crafted paddle talk should cover topics regarding river safety, proper equipment use, the trip plan and how to paddle. The talk should be informative, but also fun. It should be a thorough enough to cover everything needed, but not so long that people stop listening. 15 to 20 minutes is perfect.
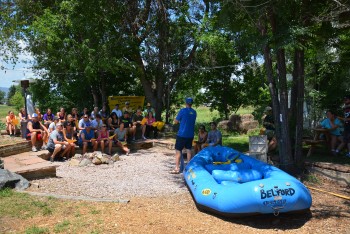
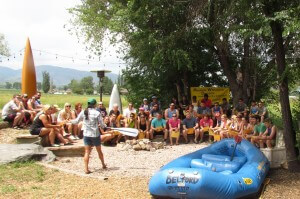
On a lot of trips, the safety talk is conducted at the river put-in. At Mountain Whitewater, we conduct our paddle talks at our office. This allows for guest to be focussed on the safety talk without the distraction of looking at the river. The trip leader will conduct the safety talk for each trip. This allows for the trip leader to properly evaluate the group and interject their own style and humor to the talk. Each guest is given a copy of the safety talk check-list so they can follow along, with one guest checking items off the list as they are covered by the trip leader to ensure all topics are covered. The following is an example of a safety talk and the topics that should be included.
Introduction and equipment:
- Greeting and introduction.
 Outline of the plan for the day, length of trip, weather and brief itinerary.
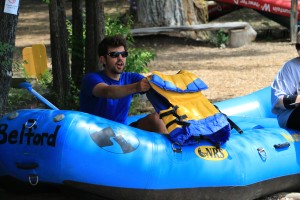
- The importance of quality safety gear – we use self-bailing boats with toe straps to help keep you in the boat, class V lifejackets to give great floatation, splash jackets and fleece for added warmth, and kayak style helmets to protect from rocks and flying paddles.
- Lifejackets – Make sure they are tight so that when we pull up on the shoulder straps it stays in place. Wear your lifejacket at all times. Do not undo any of the buckles or straps.
- Paddle boats – All of our trips are paddleraft trips. Team of paddlers listens to the guides’ commands to get the boat downriver. This is a team activity, everyone will need to participate and paddle.
Paddling and commands:
- holding a paddle – Always have one hand on the t–grip (top of the paddle). The other hand when paddling will be as close to the blade as possible,
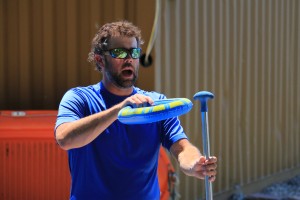
- forward paddle
this gives better leverage. The more leverage you
have, the less work you do.– Put the blade in the water in front of you and then bring it back. - back paddle – Put the blade in the water behind you and then bring it forward using your hip as a fulcrum point.
- left turn – Left side back paddles, right side forward paddles
- right turn –Right side back paddles, left side
forward paddles. - stop –Stop paddling
- hold on or bump or lean-in – Get ready for a bump, brace yourself
- high side – If the boat is going to hit a large rock with force, we all need to jump onto the tube that is going to hit the rock; the high side is always downstream. Wait for the guide to call high side, jump to the downstream tube as fast as possible, and wait for the guide to tell you to return to your positions.
- Intensity of the guides’ voice – As things get more intense the guides voice reflects that, start paddling harder.
- Importance of paddling – The motor of the boats is you and your paddle. If you turn off the motor then the boat has no steering, power or brakes. Paddle hard.
River safety and rescue:

- Swimming – This is a rocky, low-volume river. When swimming, keep your feet downstream, float flat on your back and bounce off rocks with your feet. Get to shore, your boat or another boat. Keep your eyes open for a rope bag. If the water is deep, turn on your stomach and swim to the closest safe spot. If not, back paddle with your arms and legs.
- Foot entrapment – Do not stand up in the river. Your foot could become lodged underneath a rock, the current pushes you forward, and suddenly you are stuck face down in the water. Sounds terrifying! DON’T stand in moving water.
- Flipping – Occasionally boats can and do flip over. Follow all the same swimming procedures; the boats stay afloat whether right-side-up or upside-down. Do not hold onto the downstream side of the boat because we don’t want anyone smashed between the boat and downstream rocks.
- Finding yourself underneath the boat – Get out from there. Put your hands above your head and push on the boat, use them like you are walking with your hands. Pick one direction and keep going.
- Point positive – The guides may point while you are swimming, go that direction. We are pointing which way to go, not to look out for something. The faster they point, the faster you should go that way.
- Rope bag –
 all have bags full of rope to tow you in if you get away from the boat. Keep your eyes open for ropes coming from your boat, other boats or shore. Swim to get the rope. Hold onto the rope, not the bag, and put it over your shoulder. We will tow you in backwards.
- Other boats – Other boats are happy to pull you in, go to whomever is closest. If a kayaker is towing you, grab onto the rear tow strap, kick hard with your feet. They will tow you to shore. Do not grab any other part of their boat, paddle or them.
- Pulling someone in –Grab them by the shoulder straps of their lifejacket, brace your knees on the boat and fall backwards. Use your body weight not your arms. The person being pulled in should kick with their feet, just like getting out of a pool. If you still can’t get them in dunk them down into the water so that the buoyancy of the lifejacket can help you out (make sure you let them know what you are doing).
- Strainers – Strainers are objects in the river like trees or branches that allow water to flow through but not people. Swim aggressively away from strainers. If you cannot swim away from the object, fight your way over the strainer, never allow yourself to swim under the strainer.
Other topics:
- Water Fighting – Water fighting is allowed on warm days for willing parties. Don’t splash if someone doesn’t want to. Watch for flailing paddles, don’t splash or squirt someone in the face. Stay in your raft. Do not water fight above rapids.
- Any medical condition that we should know about? Please let your guide know about any medical conditions or drugs that you are taking that may help us in an emergency.
- Litter – If we catch anyone marring our beautiful office, you will be boatless. Seriously, we want to keep this beautiful for us and everyone else. Everything that we bring in, we bring out. There is also recycling available at the shop.
- Get Your Gear – Follow guides to get your gear. Please be prudent as we are on a strict time schedule. The order you wear your gear from bottom to top is: bathing suit, wetsuit, fleece, splash jacket and then your pfd.
- Natural Flowing Rivers – We do not expect all of these things to happen, however, this is a naturally flowing river, you are not at Disney Land, so it is possible for some of these things to happen.
Rope Safety: How to Properly Use a Throw Bag
A discussion about rope safety and the proper use of a throw rope in whitewater rafting and whitewater rescue.
by Ben Costello, April 2016
To put it simply, a rope bag or throw bag is a bag filled with rope. It is a common river rescue tool that is carried on every raft at Mountain Whitewater. Most commercially available throw bags are made up of a nylon or Cordura bag filed with Polypropylene (or other floating material) rope. The ropes are made from a synthetic material that doesn’t lose its integrity when it gets wet. Max loads range from 950-2500+ lbs depending on the material. Ropes range in size and shape depending on their intended use. They will generally be made with bright colors and even reflective tape to ensure high visibility for the rescuer and the person being rescued.
There are bags designed to be worn around your waist, bags designed to be clipped onto a D-ring on your raft, bags designed to fit inside a small kayak and many others. Here are a few examples of throw bags that can be purchased from NRS:
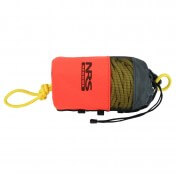
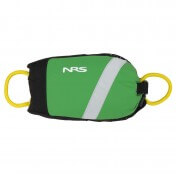
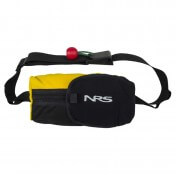
Throw bag images courtesy of www.NRS.com
How To
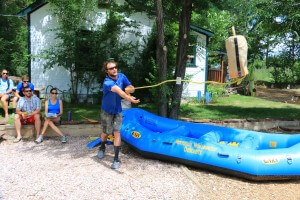
The rope bag toss is one of the guide’s best ways to get guests to safety. Anyone that may have to throw a rope should practice regularly. As with most things, the better prepared you are for a rope toss through practice, the better you will perform when someone’s life is on the other end. Lucky for us, there is a road alongside much of the Cache La Poudre River. This allows our bus drivers to stop at the bigger rapids during high water to add another set of hands to help with throwing ropes.
When using a throw bag, there are several factors to consider. If possible, you should set-up before the rescue to ensure the best success. Trying to gain eye contact with the person to whom you’re throwing a rope. Swimmers are more likely to grab a rope if they see it coming and can look for it. Yelling “ROPE” before throwing a rope bag can also help gain the swimmers attention.
Most bags are best thrown with an underhand grip, though there are some that are designed to be thrown overhand. In order to throw a throw rope, you must hold the loose end of the rope with your non-throwing hand and grasp the bag firmly with your throwing hand. Make sure to leave about ten feet of “tail” on the loose end so you can let out some rope if needed. As you throw and release the bag it is VERY important that you don’t let go of the loose end…that’s what you’ll use to pull the swimmer in. When you throw, yell “rope” and aim straight at the swimmer’s head. As you throw the rope, the rope will unravel from the bag.
If you manage to hit the swimmer in the head, you’ve made a great shot. Now the swimmer only has to grab the rope to be pulled in instead of swimming to it. Hold firmly to the rope and make sure your swimmer does the same. If they hold the rope over their shoulder while floating on their back with their feet pointed downstream, it will be easier on both you and them. You can tow the swimmer back to the boat or shore or pendulum them towards shore or another boat to allow them to climb out on their own.
Some things to keep in mind…
- Make sure you have secure footing either on shore on the raft.
- Having another person that can help back you up is a great idea. It’s nice to have someone that can help you pull the swimmer to safety and make sure you don’t get pulled into the river yourself.
- Be aware of where the swimmer well end up after their pendulum to shore. Don’t swing them into any river hazard.
- Make sure you repack your throw bag properly after every time you use it to ensure easy unraveling and not a knotted mess.
- If possible, step toward your target as you throw to improve accuracy.
- Don’t release the rope to early or too late. Your release should aim the rope at your target.
- If there are several of you with a rope to throw, don’t all throw at the same time. This will prevent potentially dangerous tangling of the ropes.